


Facebook is a powerful platform, and the ability to advertise on the platform is an exceptional tool for businesses to drive sales and generate leads. However, if you don’t know what you’re doing, Facebook advertising can be daunting. And when I say daunting, I mean most people don’t even know they have the ability to advertise on Facebook, let alone run a single ad or use tools like custom audience creation.
There’s never any guarantee that you will reach your goals, get any sales or opt ins, or make any of your money back. But, there are tools that can help you maximize each dollar spent and get closer to your end goal.
One such tool is a custom audience. A custom audience on Facebook is an audience you can create based on your existing buyers or contact list for which you would like an ad to be served. Essentially, it allows you to reconnect with existing leads or buyers. It’s a strong audience to target because these are people who have already shown interest in your brand by visiting your website, opting in, making a purchase, visiting your Facebook page, etc.
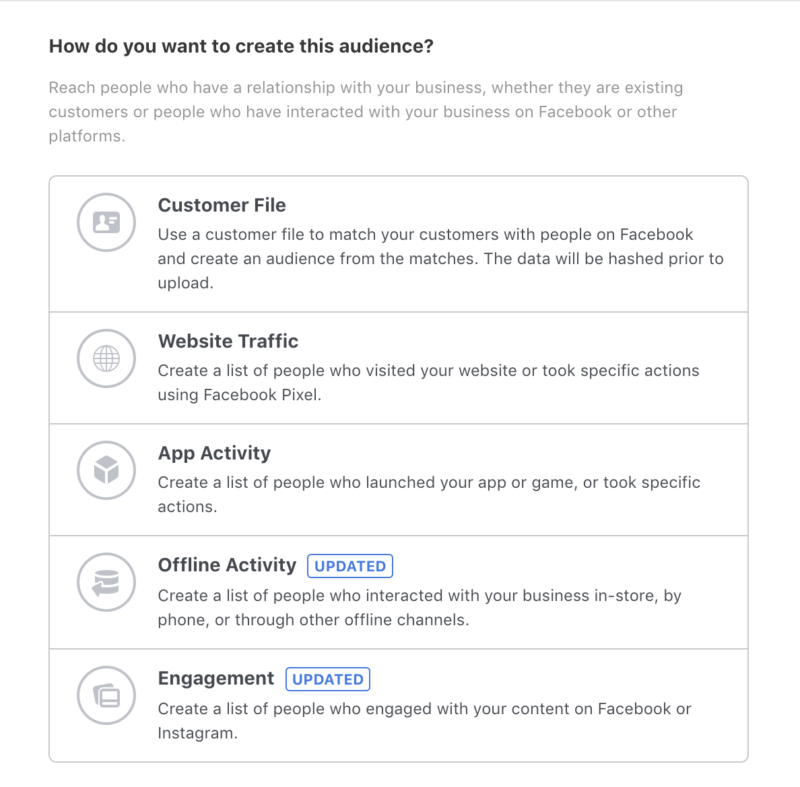
There are four ways to create a custom audience. You can create an audience from your customer list, an audience from your website, an audience from your mobile app, or an audience based on engagement.
To create an audience from your customer list:
Log-in to your business manager, and select “Business Manager” from the top left corner. Select “All Tools” from the dropdown menu, then select “Audiences” under the assets column.
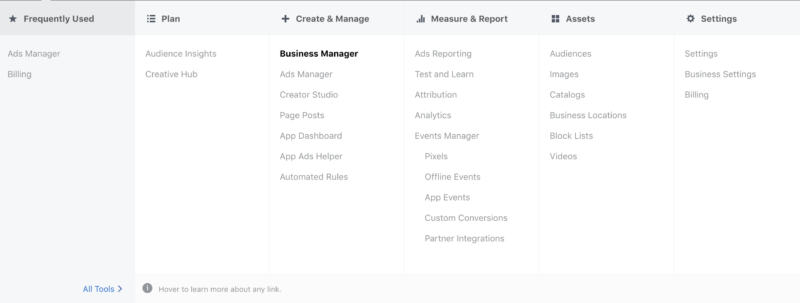
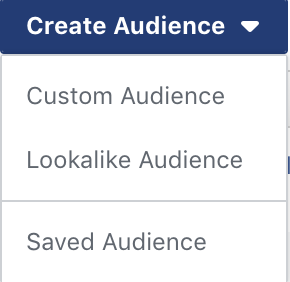
Next, select the blue “Create Audience” button and click “Custom Audience” from the dropdown menu.
On the next pop-up window, select “Customer File”.
Then, you’ll need to select how you would like to import data. Finally, you can upload your file, and name your audience.
When creating a custom audience from your customer list, Facebook allows you to upload a CSV (comma separated values) spreadsheet, copy and paste data, or log-in to your Mailchimp (if you use Mailchimp) to upload data from there. When importing data, you’ll want to be sure to include at least name and email. Facebook will then create an audience based on this list. You can choose to show an ad to this audience, or you can choose to exclude the audience and make sure Facebook does not show the ad to this audience. You should choose to exclude an audience when you are trying to reach NEW customers.
To create an audience from your website:
First, log-in to your business manager . Select “Business Manager” from the top left corner, select “All Tools” from the dropdown menu and select “Audiences” under the assets column.
Select the blue “Create Audience” button and select “Website Traffic” from the pop-up window. Next, select the Pixel you have placed on your web page along with the pixel event for which you would like to target – this can be purchases, leads, page visits, or even add to cart.
Finally, add the number of days for which you would like the data to be pulled – the audience will only populate with people who have taken the specified action(s) on your website in the allotted time, name your audience and create your audience.
When creating a custom audience based on website traffic, Facebook allows you to target people who have taken a specific action on any webpage where you have a Facebook pixel placed. If you want to learn more about pixels and how to properly place them, read our article about it here. This can be a helpful tool if you’re looking to retarget anybody who visited your page, took an action (like added product to the shopping cart), but didn’t make a purchase.
To create an audience from your mobile app:
Follow the first five steps from the sections above. Select “App activity” from the pop-up menu. Next, select your app from the dropdown menu – this is especially important if you have multiple apps. Select the app action for which you would like to target, name your audience, and finally create your audience.
Facebook allows you to pass user data from your app to Facebook, using Facebook SDK. Similar to targeting website traffic, you can target users who have taken a specific action on your app. Consider targeting an audience that has downloaded the app but hasn’t logged in yet, or someone who uses the app but hasn’t yet upgraded to premium.
To create an audience based on engagement:
Follow the first five steps from the sections above, to access the custom audience manager. Select “Engagement” from the pop-up menu and then select the group of people you would like to target based on engagement – you can select video for people who have watched a video on your page, lead form for people who have opened or completed a lead form on your page, Facebook page for people who have interacted with your Facebook page, and so on.
Next, select the Facebook page you would like to pull data from using the dropdown menu – this is especially important if you have multiple Facebook pages, and are focusing on one specifically. Select the action you want to target. You can add the number of days for which you would like data to be pulled and name your audience. Finally, create the audience.
This custom audience tool can be used to target people who have taken actions or engaged with content across all of Facebook’s platforms and services.
Using custom audiences can help you generate more leads that are better qualified, can help drive website traffic, can help increase online purchases, store-visits, and can help better promote a service. When you’re showing your ads to the right people that you choose, you’re more likely to make your money back and reach your goals.
Have you ever used custom audiences before? What’s your experience?


You must be logged in to post a comment Login